
How to Install PVC Cladding for Hygienic Walls Easily
- tim7892
- Feb 18
- 9 min read
Installing PVC Cladding for Hygienic Wall Finishes Made Easy
Mounting PVC wall cladding in a busy commercial kitchen means more than just ticking a compliance box. Without a perfectly prepared surface and careful planning, even top-tier panels fail to deliver reliable hygiene. European guidelines highlight the need for careful cleaning, dust removal, and risk assessment before installation, making meticulous preparation the foundation of a lasting and safe result. This guide highlights the critical steps for achieving a truly hygienic and professional finish, tailored for British kitchens.
Table of Contents
Step 1: Assess And Prepare The Installation Area
Step 2: Select And Cut PVC Cladding Panels
Step 3: Apply Adhesive And Position Panels
Step 4: Fix And Secure Panels With Trims And Profiles
Step 5: Seal Joints And Ensure Waterproof Finish
Step 6: Inspect Installation And Verify Hygiene Compliance
Quick Summary
Key Takeaway | Explanation |
1. Thoroughly clean the surface | Ensure all contaminants are removed to guarantee strong adhesion and long-lasting installation of PVC wall cladding. |
2. Measure accurately before cutting | Precise measurements prevent gaps and ensure seamless fitting of cladding panels for hygienic environments. |
3. Use appropriate adhesive technique | Employ a zigzag application pattern for even adhesive distribution, ensuring moisture resistance and durability. |
4. Secure trims and profiles properly | Properly installed trims provide a professional finish and enhance the wall’s hygiene by covering exposed edges. |
5. Conduct a final inspection | A thorough inspection verifies compliance with hygiene standards, ensuring a flawless installation that prevents future issues. |
Step 1: Assess and prepare the installation area
Preparing the installation area is a crucial first step in successfully fitting PVC wall cladding for hygienic environments. Your goal here is to create a clean, structurally sound surface that will support a professional and long-lasting installation.
Begin by conducting a comprehensive surface inspection. Look for any existing wall damage, moisture issues, or structural irregularities that could compromise your cladding. Pay special attention to areas near water sources or potential humidity zones. The European Hygienic Engineering and Design Group recommends thorough risk assessments for hygienic environments, which means checking for:
Uneven wall surfaces
Existing mould or mildew patches
Structural cracks or weaknesses
Areas with potential water damage
Previous wall coverings that need removal
Next, you’ll need to prepare the surface meticulously. Clean the entire wall area thoroughly using appropriate cleaning solutions suitable for your specific wall material. Remove all dust, grease, and potential contaminants using industrial-strength cleaners that won’t damage the underlying surface. For food preparation areas, this step is especially critical to maintain strict hygiene standards.
Remove any existing wall coverings, wallpaper, or loose paint using appropriate tools. Ensure the wall is completely dry and free from moisture before proceeding with cladding installation. If you encounter significant surface irregularities, you may need to use a levelling compound to create a smooth, even base.
Proper preparation is 50% of a successful PVC wall cladding installation.
Expert tip: Invest in a high-quality moisture meter to accurately assess wall conditions before installation, preventing potential future issues with adhesion or mould growth.
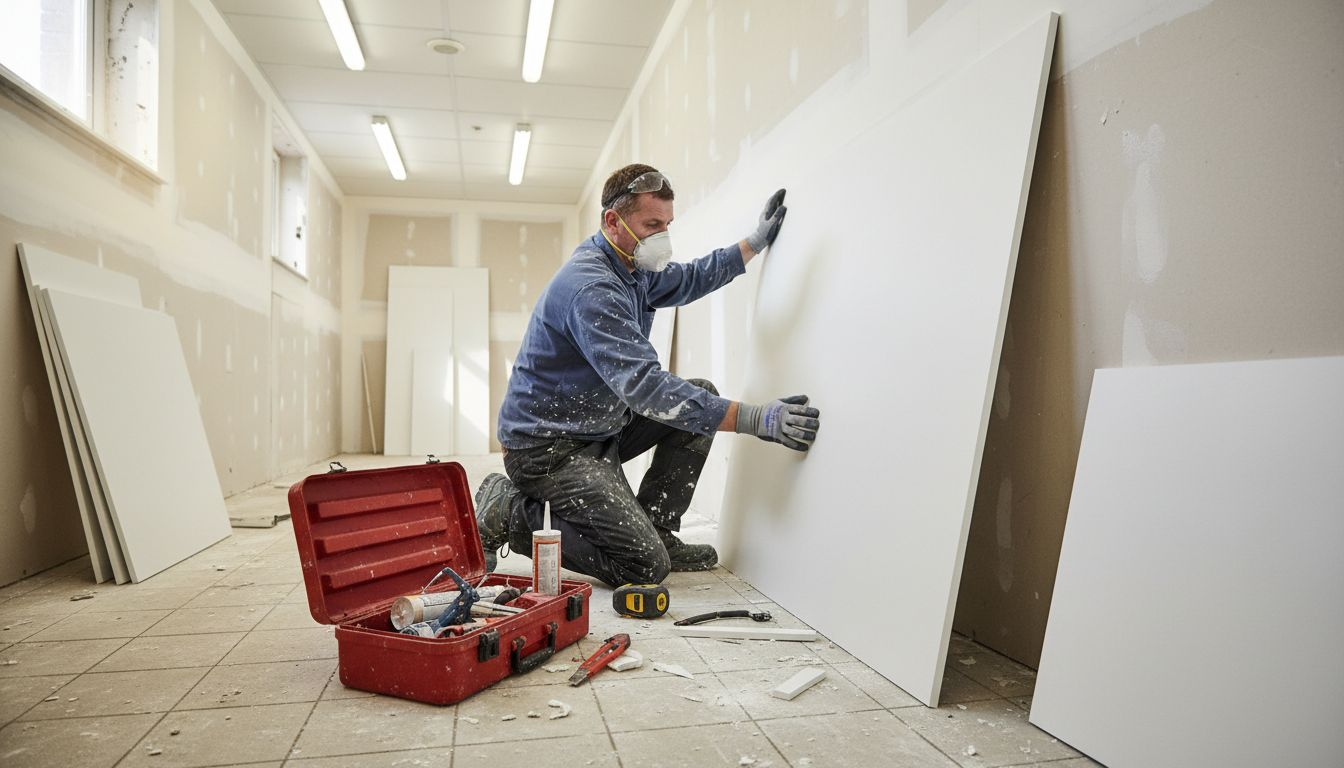
Step 2: Select and cut PVC cladding panels
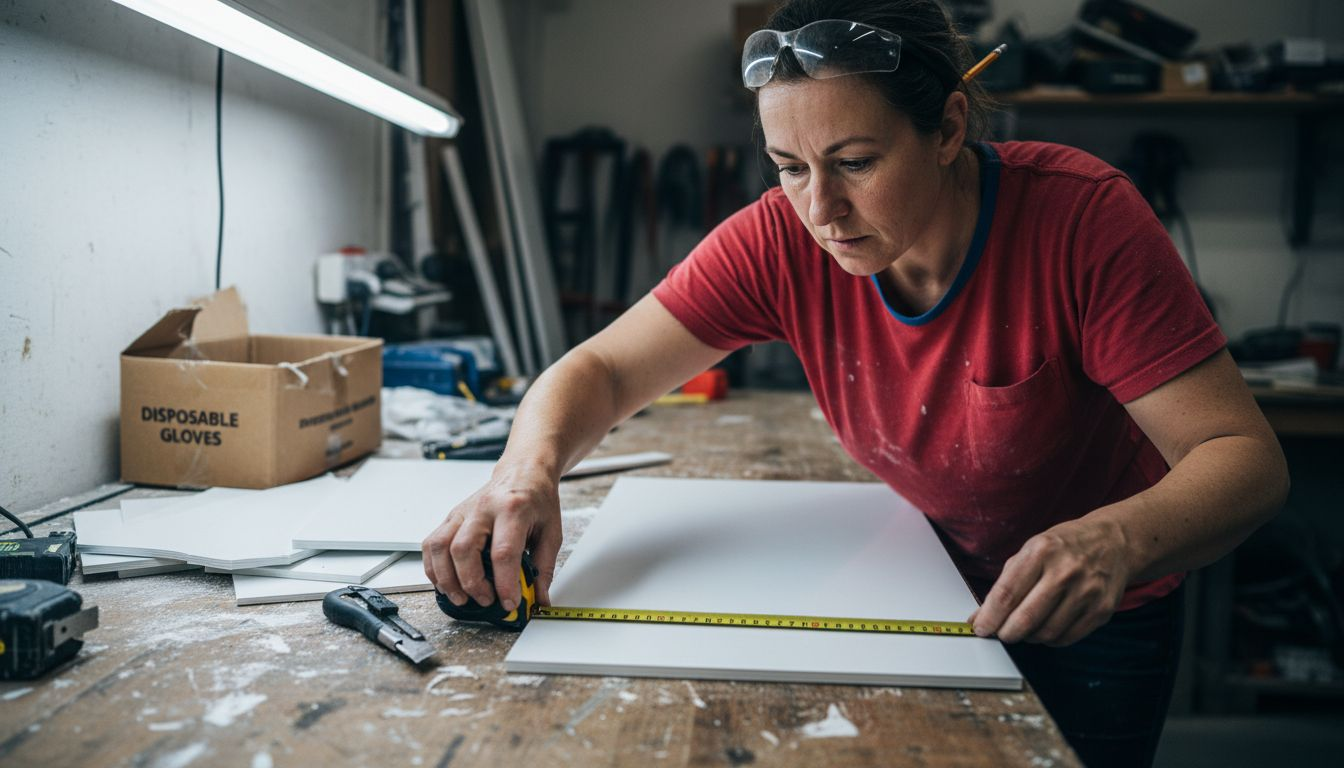
Selecting and cutting PVC wall cladding panels requires precision and careful planning to ensure a professional, hygienic installation. Your goal is to create perfectly fitted panels that will provide a seamless, moisture-resistant surface for your specific environment.
Begin by carefully measuring your installation area. Use a high-quality metal measuring tape and record measurements precisely, allowing a small margin for potential adjustments. PVC cutting techniques recommend measuring multiple times to guarantee accuracy before making any cuts. For each panel, you’ll want to consider:
Total wall height and width
Location of electrical outlets
Potential obstacles like pipes or fixtures
Necessary overlap or trim requirements
Allowance for potential expansion
Next, select the appropriate cutting tools for your specific PVC panels. A sharp utility knife, electric jigsaw with a fine-toothed blade, or specialised PVC cutting saw will provide clean, precise cuts. Always wear safety glasses and work gloves to protect yourself during the cutting process. When cutting, support the panel on a stable, flat surface to prevent unnecessary stress or potential cracking.
Make your cuts slowly and steadily, applying consistent pressure to ensure a straight, clean edge. For complex cuts around outlets or irregular shapes, consider creating a paper template first to test the fit before cutting your actual panel.
Precision in cutting determines the quality of your final hygienic wall installation.
Expert tip: Allow PVC panels to acclimatise to room temperature for at least 24 hours before cutting to prevent potential material distortion and ensure the most accurate fit.
Step 3: Apply adhesive and position panels
Applying adhesive and positioning PVC wall cladding panels is a critical stage that determines the overall quality and longevity of your hygienic wall installation. Your objective is to create a secure, seamless surface that meets professional standards for moisture resistance and cleanliness.
Begin by selecting a high-quality construction adhesive specifically designed for PVC panels. Panel installation techniques recommend using a construction-grade polymer adhesive applied in a strategic pattern. For optimal results, follow these application guidelines:
Apply adhesive in a consistent zigzag or serpentine pattern
Ensure complete coverage across the panel’s back surface
Leave small gaps to allow for potential thermal expansion
Use a notched trowel for even adhesive distribution
Check adhesive compatibility with your specific PVC panel type
Position your first panel carefully, using a spirit level to ensure perfect vertical alignment. Press the panel firmly against the wall, starting from the centre and working outwards to eliminate air bubbles and ensure complete adhesive contact. For areas with electrical outlets or complex shapes, create a precise paper template beforehand to guide your cutting and positioning.
Work systematically across the wall, maintaining consistent spacing and alignment between panels. Use spacer blocks if necessary to keep panels perfectly straight and create uniform gaps for any required trim pieces.
Precise adhesive application is the foundation of a professional hygienic wall cladding installation.
Expert tip: Wear clean disposable gloves during installation to prevent oils and dirt from contaminating the panel surfaces and adhesive interface.
Step 4: Fix and secure panels with trims and profiles
Securing PVC wall cladding panels with the right trims and profiles is essential for creating a professional, hygienic finish that meets strict industry standards. Your goal is to create a seamless, moisture-resistant surface that looks impeccable and performs exceptionally.
Begin by selecting appropriate stainless steel fixings for your specific wall type. Wall panel installation instructions recommend using specialised stainless steel screws or pins designed to secure PVC cladding firmly. For optimal installation, consider these key considerations:
Choose corrosion-resistant fixings
Match screw length to panel thickness
Use washers to distribute fixing pressure evenly
Ensure fixings penetrate solid backing material
Space fixings at recommended intervals
Carefully install edge trims and corner profiles to protect panel edges and create a professional finish. Two-part finishing trims work best for maintaining a clean, hygienic appearance and simplifying future maintenance. Position corner trims precisely, ensuring they cover panel edges completely and create a smooth, sealed interface.
Work methodically across your installation, checking alignment and ensuring each trim piece fits snugly against the panels. Use a rubber mallet to gently tap trims into place, avoiding excessive force that might damage the profiles.
Precise trim installation transforms good cladding into exceptional hygienic wall solutions.
Expert tip: Keep a damp microfibre cloth nearby to immediately wipe away any adhesive or fixing residue, maintaining a pristine finish during installation.
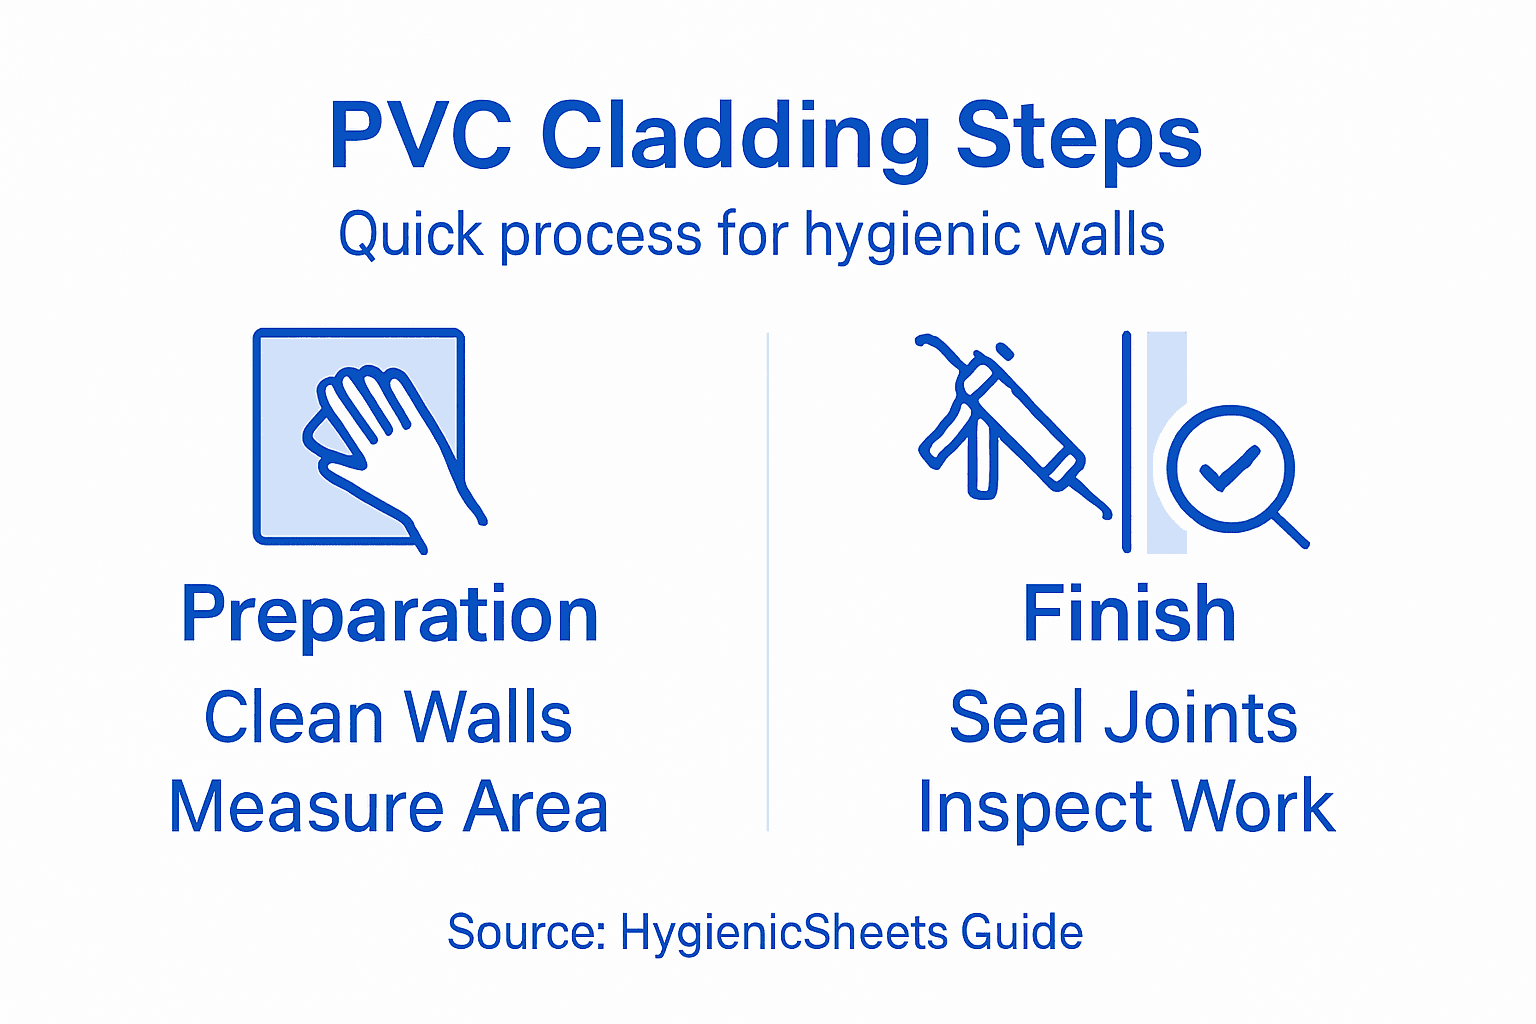
Step 5: Seal joints and ensure waterproof finish
Creating a truly hygienic wall surface requires meticulous attention to joint sealing and waterproofing. Your final objective is to eliminate potential moisture ingress points and create a seamless, impenetrable barrier that maintains long-term cleanliness and structural integrity.
Begin by selecting an appropriate sealant that matches your specific PVC cladding requirements. Wall cladding waterproofing techniques recommend using mold-resistant silicone sealants designed for hygienic environments. Prepare your sealing process by considering these critical factors:
Choose sealants compatible with PVC materials
Select professional-grade, food-safe silicone products
Match sealant colour to panel or trim colour
Ensure sealant provides antimicrobial protection
Check manufacturer’s specifications for application
Apply the sealant methodically along panel joints using a professional-grade caulking gun. Work slowly and consistently, maintaining steady pressure to create a smooth, continuous seal. Use a specialist smoothing tool to remove excess sealant and create a professional finish that prevents water penetration and potential bacterial growth.
Pay extra attention to corners, edges, and areas around fixtures where moisture might accumulate. Run your finger or a specialised smoothing tool along the sealant line to ensure complete coverage and a neat, uniform appearance.
A perfect seal is the difference between adequate and exceptional hygienic wall protection.
Expert tip: Allow sealant to cure completely before exposing the surface to moisture, and always test a small inconspicuous area first to ensure colour and finish compatibility.
Step 6: Inspect installation and verify hygiene compliance
The final stage of your PVC wall cladding installation involves a comprehensive inspection to ensure the highest standards of hygiene and professional quality. Your goal is to meticulously verify every aspect of the installation against industry-standard requirements.
Begin by conducting a thorough visual assessment. PVC installation inspection protocols_Pipe_Inspection_Guide) recommend examining the entire surface for critical compliance factors. Systematically check for:
Uniform panel alignment
Complete joint sealing
Absence of gaps or irregularities
Proper trim and profile installation
Smooth, seamless surface finish
No visible adhesive residue
Correct colour matching
Measure and document key installation parameters using precision tools. Pay particular attention to panel edges, corner joints, and areas around fixtures. Use a bright, direct light source to highlight any potential imperfections that might compromise the hygienic integrity of the wall surface.
Verify that all materials and installation techniques meet the specific requirements for your intended environment, whether it’s a food preparation area, healthcare facility, or industrial kitchen. Cross-reference your installation against manufacturer guidelines and relevant industry standards.
For quick reference, here is a summary of key hygienic installation steps and their primary focus:
Installation Step | Core Objective | Typical Tool or Material |
Preparation | Sound wall surface | Industrial-strength cleaner |
Cutting panels | Accurate fit and seamless finish | Metal tape, jigsaw |
Applying adhesive | Strong, moisture-resistant bond | Polymer adhesive, trowel |
Securing trims | Professional hygienic appearance | Stainless screws, profiles |
Sealing joints | Complete waterproof hygiene | Silicone sealant, caulking gun |
Inspection | Compliance and spotless finish | Precision tools, high-res camera |
Meticulous inspection transforms a good installation into an exceptional hygienic solution.
Expert tip: Take high-resolution photographs of the completed installation from multiple angles to document your work and provide a baseline for future maintenance checks.
Here’s a comparison of common mistakes and their professional solutions for PVC wall cladding installation:
Common Mistake | Impact | Professional Solution |
Insufficient cleaning | Reduced adhesion and longevity | Clean with industrial solution |
Poor measurement | Visible gaps or panels misaligned | Measure and double-check area |
Incorrect adhesive | Panel detachment or leaks | Use PVC-compatible adhesive |
Lack of expansion gap | Panel warping | Leave margin for expansion |
Unsealed joints | Risk of mould and moisture ingress | Apply antimicrobial silicone |
Skipped inspection | Missed flaws and hygiene risks | Conduct visual and tool-based review |
Achieve Flawless Hygienic Walls with Expert-Grade PVC Cladding Solutions
Installing PVC cladding for hygienic walls demands exact preparation, precise cutting, and reliable sealing to meet strict cleanliness standards. Challenges such as uneven surfaces, poor adhesive bonding, and unsealed joints can compromise your project’s durability and hygiene. When your goal is a moisture-resistant, seamless finish that stands the test of time, selecting the right materials and accessories is essential.
At HygienicSheets, we understand these critical requirements. Our extensive range of high-quality PVC wall panels, adhesives, trims, and profiles are designed specifically for environments that prioritise sanitation, such as healthcare and commercial kitchens. Benefit from products that simplify installation while ensuring professional results supported by ISO certifications and fast nationwide delivery.
Transform your installation process today by partnering with a trusted B2B supplier dedicated to hygiene and quality. Explore our comprehensive selection of cladding solutions and accessories to secure a flawless, waterproof wall finish that meets rigorous inspection standards. Visit HygienicSheets now and take the first step towards a cleaner, more durable hygienic environment.
Frequently Asked Questions
What are the key steps to install PVC cladding for hygienic walls?
To install PVC cladding, follow these key steps: assess and prepare the installation area, select and cut the panels, apply adhesive and position the panels, secure them with trims and profiles, seal the joints, and finally, inspect for compliance. Start by thoroughly inspecting the walls to ensure they are clean and structurally sound.
How can I ensure a clean surface before installing PVC cladding?
To ensure a clean surface, use industrial-grade cleaners to remove dust, grease, and contaminants. Clean the area meticulously and allow it to dry completely before proceeding with the installation to promote effective adhesion.
What tools do I need for cutting PVC cladding panels?
For cutting PVC cladding panels, you will need a sharp utility knife or an electric jigsaw with a fine-toothed blade. Support the panel on a stable surface and take precise measurements before cutting to ensure a correct fit.
How do I apply adhesive to PVC panels?
Apply the adhesive in a consistent zigzag or serpentine pattern to the back of the panel, ensuring complete coverage. Leave small gaps for thermal expansion, and follow the manufacturer’s guidelines for adhesive application for optimal results.
What should I check during the final inspection of the installation?
During the final inspection, check for uniform panel alignment, proper sealing of joints, and the absence of gaps or adhesive residue. Ensure that all finishes appear neat and comply with hygienic standards, noting any imperfections that may need addressing.
How can I prevent mould growth after installing PVC cladding?
To prevent mould growth, ensure all joints are properly sealed with a mould-resistant silicone sealant. Maintain a clean environment and regularly inspect the cladding for any signs of moisture or damage to ensure long-term hygiene.
Recommended
Comments